Many users have reported that Chrome won’t open on Windows 11. Whenever the user double-clicks on the Google Chrome icon, nothing happens. If you’re facing a similar issue, here’s what you should do.
1. Restart your computer

Windows 11 has many bugs, and some of the bugs can prevent Chrome or other applications from starting up. Restarting the computer is the best way to prevent such bugs.
If Chrome doesn’t open on your computer, restart it. Then, open Google Chrome again. This time, the browser should open without any issues.
2. Close all background processes related to Chrome
Some Chrome-related processes can run in the background, preventing the application from starting again. This can happen in the Windows operating system, and when this happens, Chrome may not show up on your screen, but it’s running silently in the background.

You should close all Chrome-related background processes to resolve the Chrome not opening issue on Windows 11. To close all Chrome-related processes, open Windows 11 search and type in Task Manager.
Open Task Manager and close all Google Chrome processes.
3. Create a new Google Chrome Shortcut
While Windows Security or Defender is pretty robust, it has some flaws. Sometimes, it blocks legitimate applications from running. Chances are that it has blocked Google Chrome from running on the computer. You can allow Google Chrome to access the internet on Defender or create a new Google Chrome shortcut on your desktop.
1. Right-click on the Google Chrome icon on your desktop and select Open File Location.
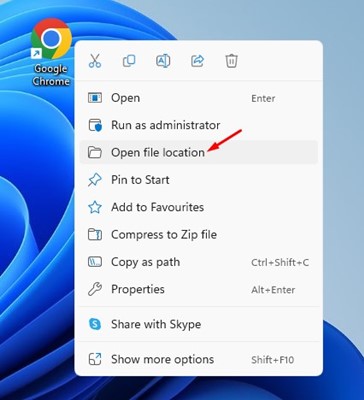
2. Right-click on the Chrome executable file and select Create Shortcut.

3. On the confirmation prompt, click on Yes.
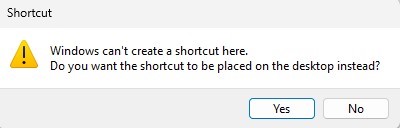
This will create a new shortcut for Google Chrome on your desktop. You need to launch this new shortcut instead of the old one.
4. Open Chrome with Compatibility Settings
Even though the latest version of Google Chrome is fully compatible with Windows 11, your version of Chrome may be outdated, or the build of Windows 11 you’re using may have a bug that creates a compatibility issue with the Chrome browser. You can eliminate such problems by opening Google Chrome with compatibility settings.
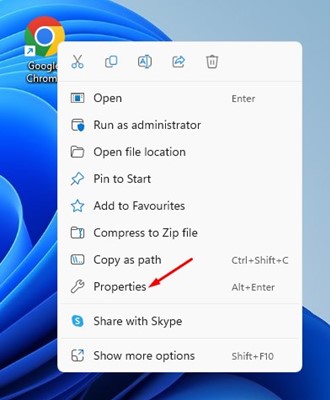
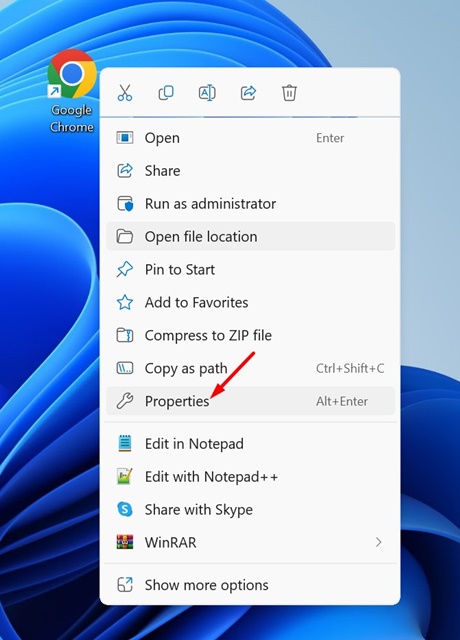
1. Right-click the Google Chrome desktop icon and select Properties.
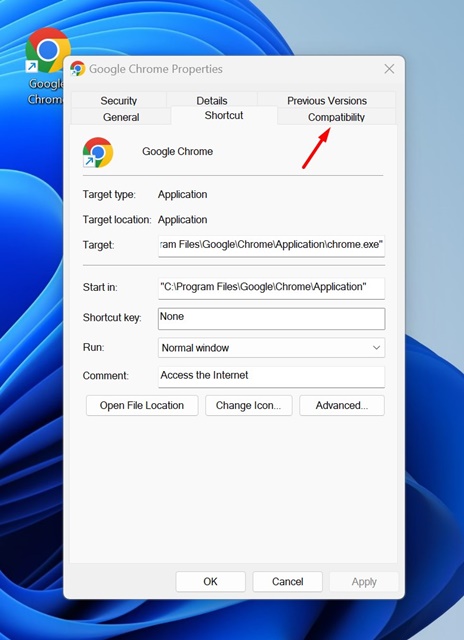
2. Switch to Compatibility.

3. Check the Run this program in compatibility mode for: and select Windows 8
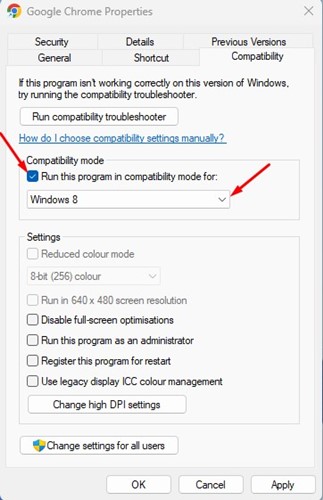
4. After making the changes, click Apply.
Run the Google Chrome browser. This time, Google Chrome will launch immediately.
5. Run the Compatibility Troubleshooter
If running Google Chrome in compatibility mode didn’t help, you can try running the Chrome Compatibility Troubleshooter.
1. Right-click on the Google Chrome app icon and select Properties.
2. Switch to Compatibility.
3. Click on Run compatibility troubleshooter.
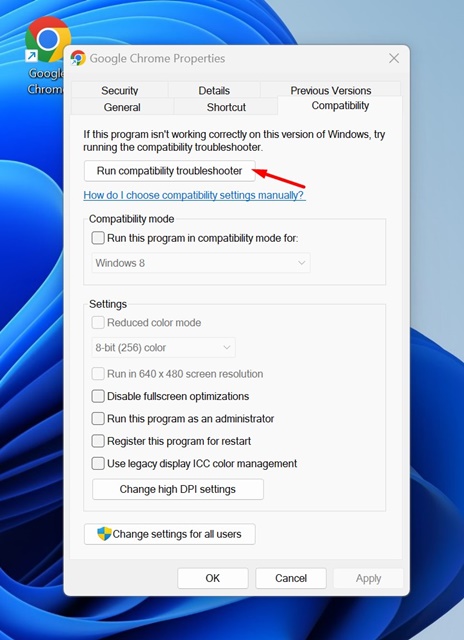
4. Follow the on-screen instructions to complete the troubleshooting process.
After making the changes, open the Google Chrome browser. This time, the web browser should open without any problem.
6. Prevent Chrome from restarting itself
There’s a feature that helps restart the application when it fails to respond. So, if Google Chrome is not responding, the feature we’re talking about will force restart the browser.
This thing happens in the background, and you won’t notice anything. Many users have claimed to fix the ‘Chrome won’t open on Windows 11’ problem just by turning off this feature. So, you can try that as well.
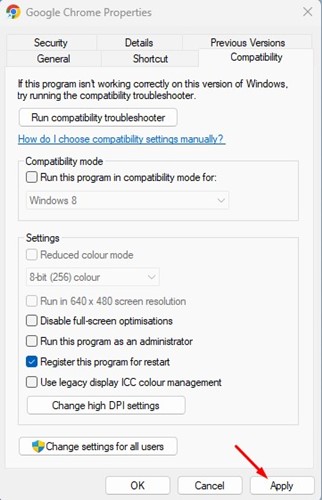
1. Right-click the Google Chrome desktop icon and select Properties.
2. Switch to Compatibility.
3. Uncheck Register this program for restart.
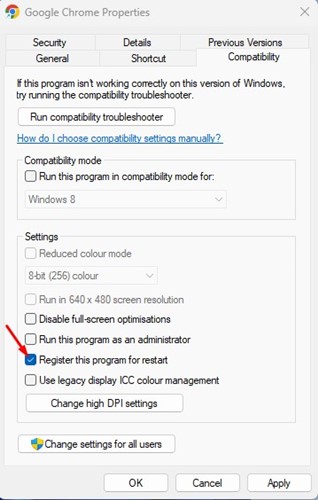
4. Click Apply and then OK.
After turning off the feature, open Google Chrome again. If the problem persists, follow the next methods.
7. Delete the Default User Data in Chrome
Google Chrome stores all your data in the User Data folder. If the data it saved were corrupt, Google Chrome wouldn’t launch. Hence, you can remove the user data default folder to fix the Chrome won’t open on Windows 11 problem.
1. Press the Windows key + R button on your keyboard. This will open the RUN dialog box.
2. Type Appdata and press Enter.
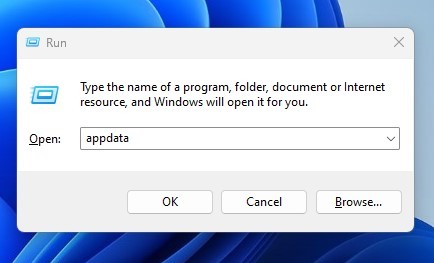
3. Locate the following path:
Local\Google\Chrome\User Data
4. Right-click on the folder named Default and select Delete
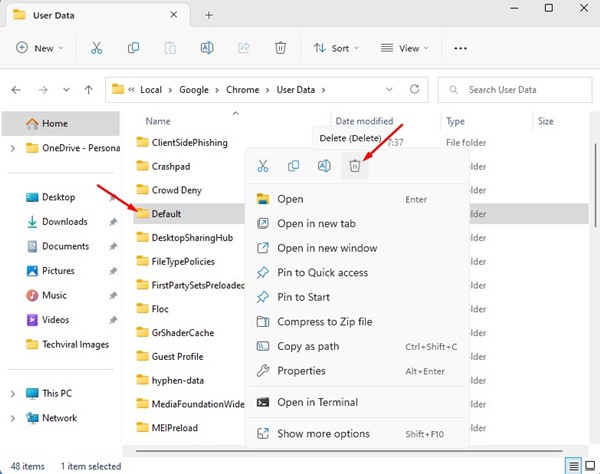
After making the changes, close the folder and open Google Chrome. You may have to log in with your Google Account again.
8. Disable Windows Defender/Antivirus Programs
Firewall systems and Antivirus Programs can often block Google Chrome from running, preventing it from opening on Windows 11.
The best way to deal with such an issue is to disable the Windows Defender Firewall or any third-party antivirus software you use.
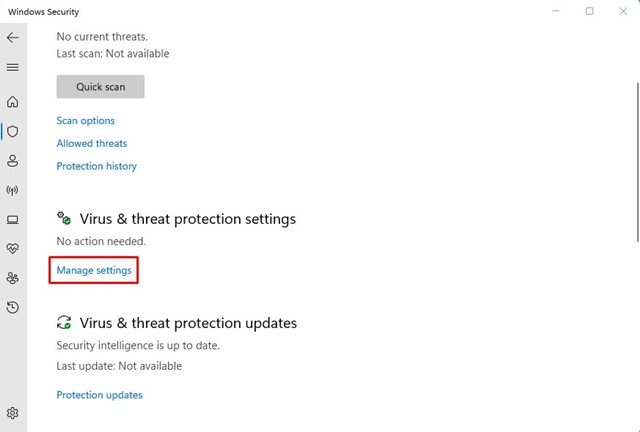
1. Open the Windows Security app and select Virus & threat Protection.
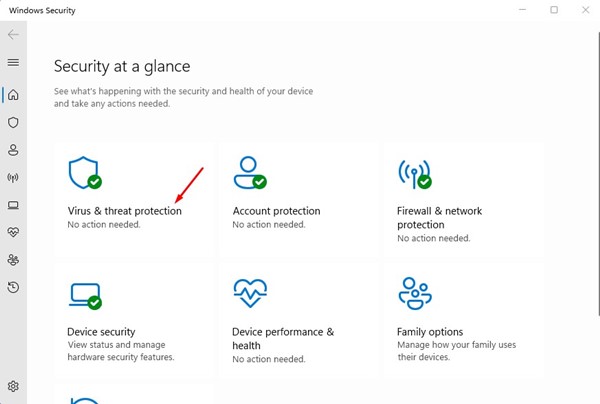
2. Click the Manage Settings link on the Virus & Threat Protection settings.
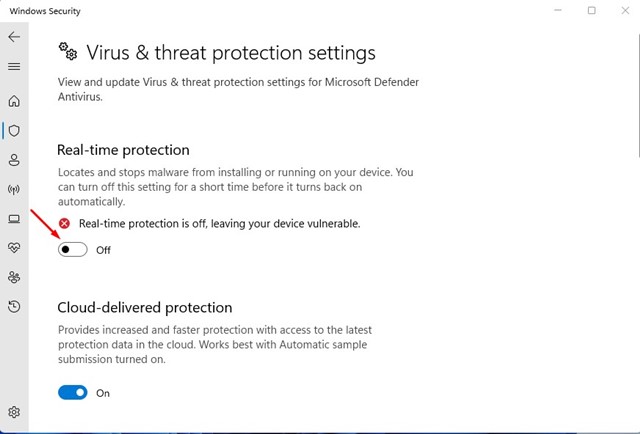
3. Toggle off Real-time Protection.
4. You also need to turn off third-party firewall programs.
9. Reinstall the Google Chrome browser
Since you can’t reset Chrome because it isn’t opening, try reinstalling it on your computer. Reinstallation will rule out any data corruption during the installation.
If Chrome is not opening on Windows 11 due to corrupted installation files, reinstallation will fix it. To reinstall Chrome, open Control Panel, right-click on Chrome, and select ‘Uninstall’. Once uninstalled, reinstall Google Chrome.
These are some of the best ways to fix Chrome not opening on Windows 11. If you need more help resolving Chrome problems on Windows, let us know in the comments.
Comments
Post a Comment